Only available for certain subscriptions; please contact us to discuss your subscription features.
Custom documents streamline the post-submission process by piping response data into official records and documents, and automatically sending them to the people that need them.
As you create forms, consider what documents you might need to generate from response data. For example
- Payment receipts to be sent to respondents and staff
- Certificates or permits respondents have applied for
- Standard letters that quote information from a response
- Duplicates of paper forms that need to be filed in addition to the online form
How It Works
There are several steps to set up a custom document:
- Create Word or PDF templates
- Upload the template to the Forms & Workflow form
- Set your template options
- Map template fields to form fields
- Save your mapped template and use the template library
- Attach the mapped template to automated emails
When set up correctly, the Forms & Workflow form will pipe data from received responses to the custom document template you created and attached to automated emails. These custom documents are then sent to the specified recipients as attachments.
Forms & Workflow will also store copies of sent custom documents in the form's Responses.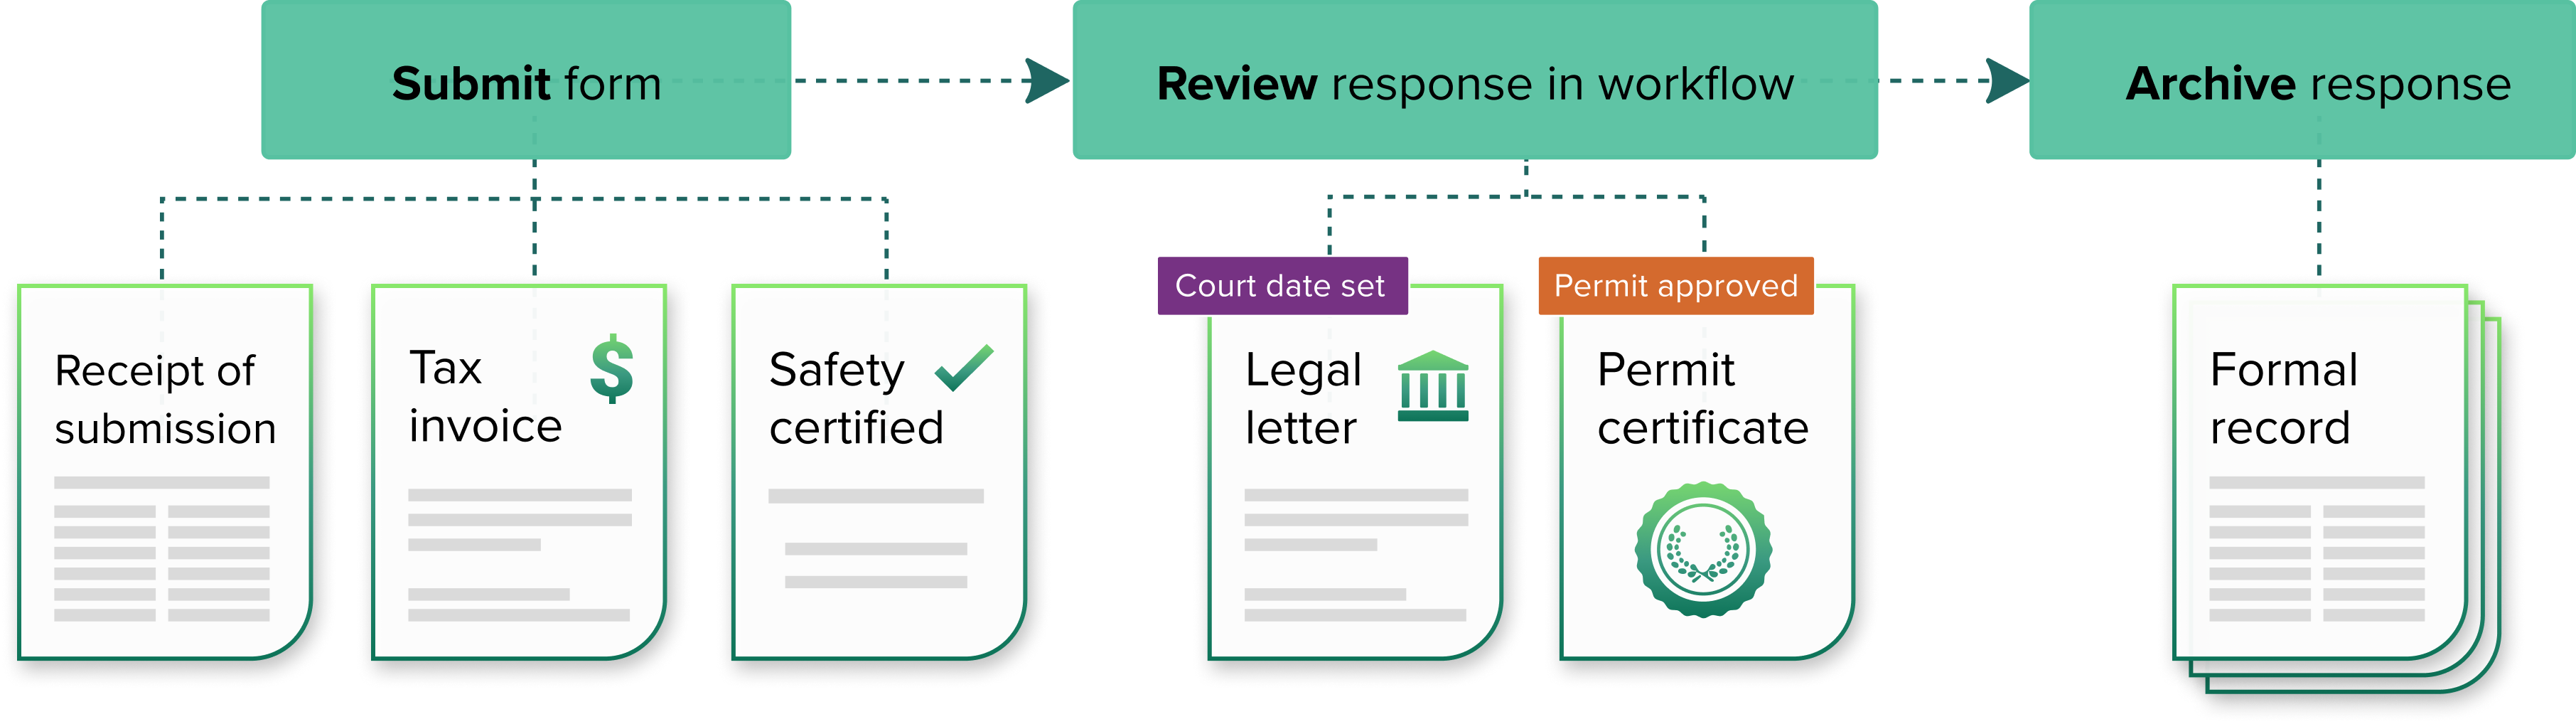
Create a Template
Your form generates custom documents by piping response data into templates you've created in Microsoft Word or Adobe Acrobat. This allows you to heavily customize the design of these documents, but also means that they must be formatted in a specific way to work with Forms & Workflow.
Microsoft Word and Adobe PDF templates are also formatted differently and suit different document types, so we recommend reading more about them before deciding which template to create:
Most kinds of response data and form metadata can be piped into a custom document; we recommend consulting the complete list of data you can pipe into a custom document as you create your template.
Upload Your Formatted Template
To upload a formatted template file to Forms & Workflow:
-
Go to your form > Settings > Form documents.
-
Select Upload a prepared template under Custom Documents.
-
Enter a Template name; this is what your template will be called in your form’s template library and when you attach it to emails.
-
Enter a Document Name; this is what custom documents generated from this template will be called. You can pipe form data into this as you would into email subject lines.
-
Upload your template by clicking in the upload window or dragging and dropping a file there. Forms & Workflow will scan the file for viruses as it uploads.
-
Once the file is scanned, select Next.
Once you've uploaded a formatted template, you'll be taken to the Template mapping screen where you can set up your template options and map template fields to Forms & Workflow fields.
Template Options and Information
Before you map fields, you should understand the template information and options you have in this screen.
At the top of the screen, you can see the Template name and any Response emails or Workflow emails it is being Used in. If you've just uploaded this template, these will be zero, but once it is being used, you can select either button to view more details.
At the top right of the template mapping screen, you’ll also see some setup options for your template. These are:
- Generate as: Use this to select whether custom documents generated from your Word template as Word or PDF files. By default this option is set to Generate as PDF so you don't need to worry about respondents or staff being able to edit data. If you intent to send custom documents to internal staff for further edits. set this to Generate as Word. This drop-down menu is only available for Microsoft Word templates.
- Rename or upload template file: Select the pencil icon to update the Template name, Document name, or re-upload the template file. If you've already fully mapped your template fields and upload a new template, you'll only have to adjust the field mapping in Forms & Workflow to the extent that it has changed. If a response is currently in workflow when you upload a replacement template, any emails that generate custom documents within the workflow and using that template will use the existing file for consistency.
- Delete template: Select the bin icon to delete the template. This will remove the template from your form's template library and from any emails it is currently used in. Any custom documents generated from a deleted template will remain available in the form Responses.
- Download template file: This option is only available if you have already mapped and saved your template. If you want to make adjustments to your template layout or content, select the download button to download the current template file. After changing the file, use the pencil button to upload your updated template file; track template uploads in your form's History tab.
Map Template Fields to Forms & Workflow Fields
In the Field mapping section, you can use the drop-down menus to select which Template field is going to Map to Form & Workflow field. Use the two columns to map your form data to the template fields you've set up in your template file, so Forms & Workflow knows where to pipe response data.
Here's a bit more information on each of the columns:
- Template fields: This column lists the Template fieldsin order in which they appear in your template and are set up and named as you created the template, so these should be descriptive. If multiple fields in your template have the same name, such as when using the same data in multiple places or piping choice selections into a PDF, they will only be listed once in this column. You don't need to map the same field multiple times.
- Map to Forms & Workflow field: For each template field, there is a corresponding drop-down menu through which you can select how it will map in Forms & Workflow. The drop-down will list form metadata first and then the form fields in the order in which they appear in the form. These menus are also searchable. For forms with repeatable groups, every repetition of the field up to the maximum number you've set will appear in the drop-down menu and will be numbered. You will also need to include fields for every possible repetition in your custom document template.
If you need to start over for any reason, you can select Clear all mappings from the Map to Forms & Workflow field drop-down menu.
Save Your Template and Use the Template Library
With the mapping complete, select Save and your mapped template will be added to the form's template library.
You can now attach it to automated emails, but if you need to access the template library go to the form Settings > Form documents and scroll to the list of templates. Each form can have up to twenty custom document templates it its template library.
This area will allow you to:
- See the Template name, when it was Last edited and by whom, and which workflow and response emails it is Used in.
-
Edit the template mapping or its options by selecting the Template name or selecting Edit mapping from the ... menu.
-
Download and change the template by selecting Download template from the ... menu. To re-upload, select the template and use the pencil icon option to edit it.
-
Select Delete from the ... menu to remove it from the library.
Attach Mapped Templates to Automated Emails
Once uploaded and mapped, you can attach a custom document to an automated email by selecting the + button under Add attachments and selecting the Template name on an email.
Now, when the email is triggered, Forms & Workflow will pipe response data into your attached template and send the completed custom document to the email recipient.
Which templates you attach to emails may depend on the purpose of the custom document you want to generate. For example:
- Attach a receipt template to the submission confirmation email for forms that take a payment, so that respondents receive an official receipt when they submit a response.
- Attach a permit template to the workflow notification email sent when permit application responses have moved to an “approved” final step. You can direct this to respondents and internal teams, so both parties are automatically sent the permit once a reviewer has approved it.
To prevent documents from bypassing a review process, custom documents cannot be manually generated; they can only be generated as attachments to automated emails. If a template is listed as Not currently in use, then you cannot generate a custom document from it. However, you can review custom documents that have been sent for a response.
Review Sent Documents
You can review custom documents that have been generated and sent by going a response in the form's Responses tab and expanding Form documents. This will list all generated custom documents for that response and the default response PDF. When you hover over a document in the list, you can:
- Select the document or the download button to download the document.
- Select the bin icon to delete the document.
- Export all custom documents generated for the response by selecting Download > Advanced export and checking Custom documents generated from response data before selecting Export.
You can also download all custom documents generated for all responses to a form, or a filtered set of responses, by selecting Bulk actions > Export [x] responses and checking Custom documents generated from response data before you Export.
These options are useful for archiving purposes if you need to delete responses to manage your organization's storage quota.
What Else?