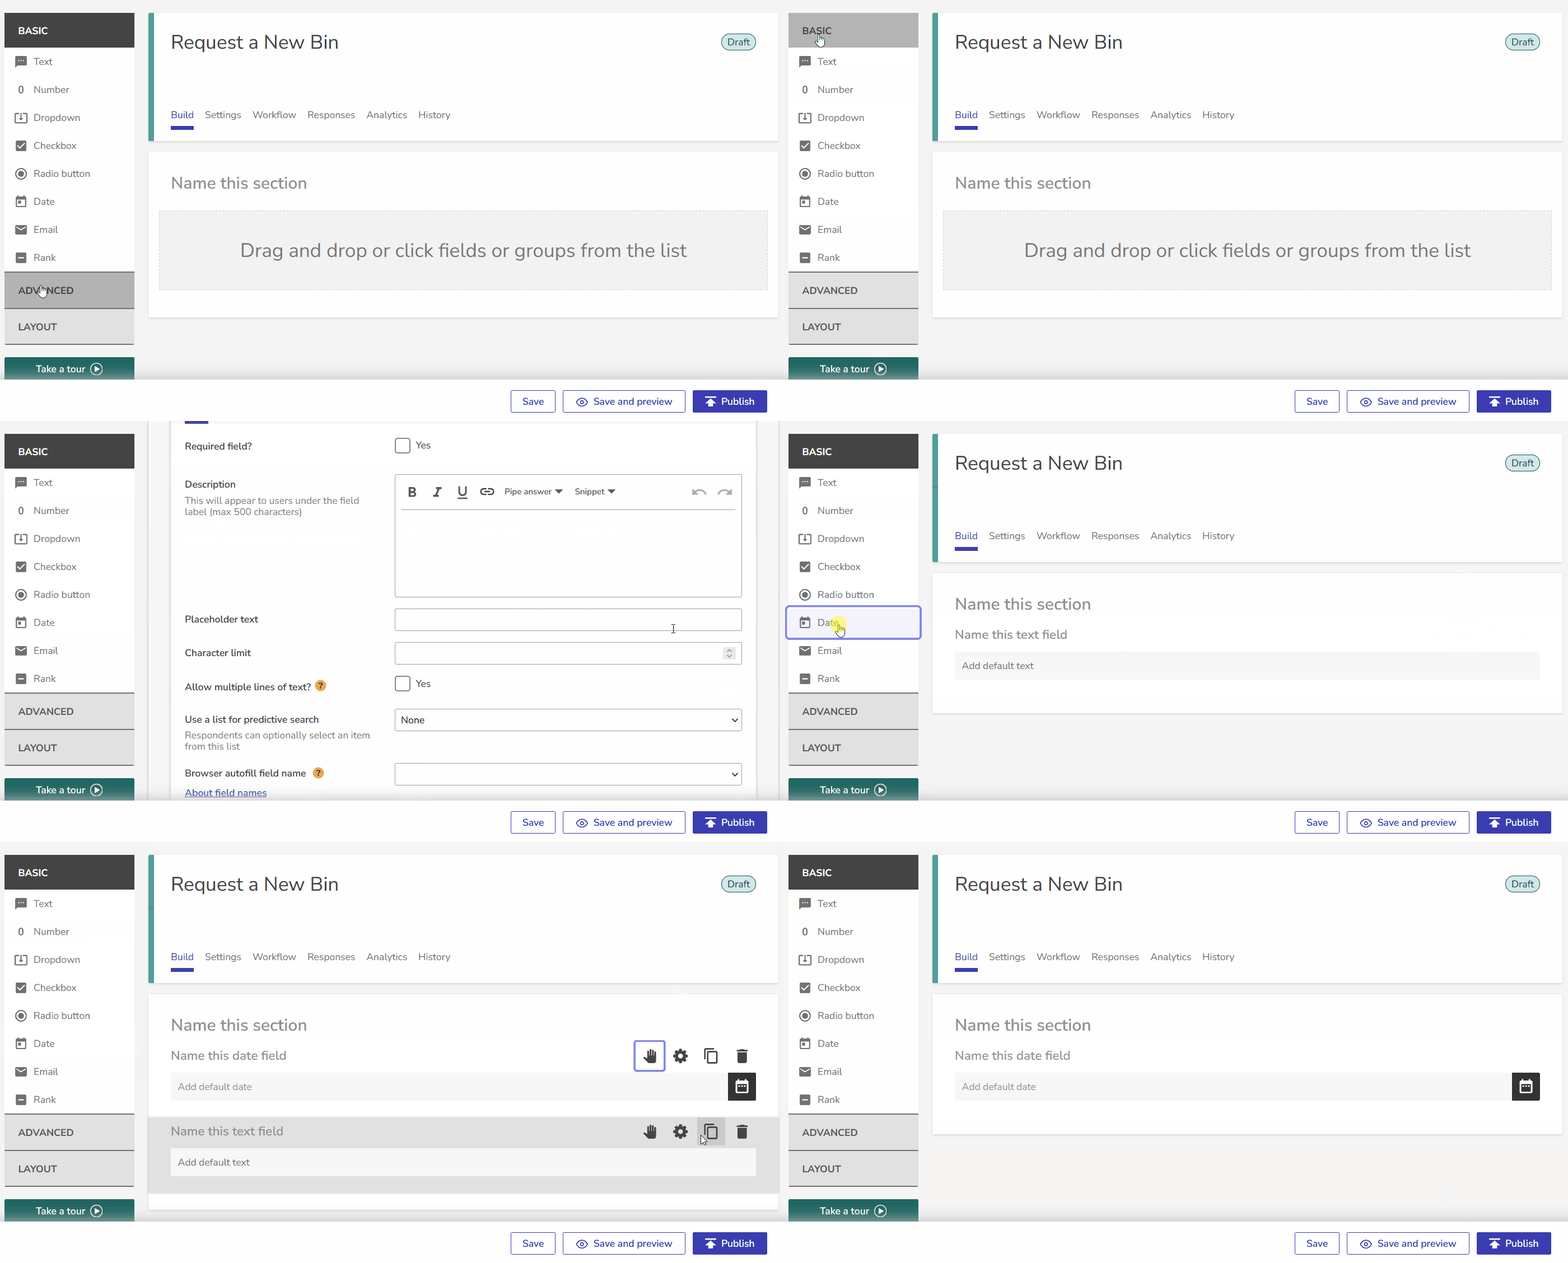
Authors, Admins, and Account owners can build forms from the Forms list. To get started:
- Select Create form and then Create new. You also have the options to build using a template or to import a form.
- Enter the form's name in the What do you want to name it? text box.
- Choose a workspace from the drop-down menu if available on your subscription.
- Select Create a form.
- In the form builder, drag and drop fields to add them to your form, and hover over the fields for more options. You'll notice that each new form automatically has a section to get you started.
- Use the Save button to save your progress and the Save and preview button to save and open a form preview in a new tab.
- When you're ready, select Publish > Publish now and your form will be live. If Form publishing review is enabled for the workspace, Authors can select Submit for review instead to send it to an Admin for approval.
Your form will go live when it is published, so you can share it and start getting responses, but remember to test it thoroughly before doing so. You may also want to customize the form settings and design before publishing it, and create workflows to process responses.
Once a form is live, you can make changes to the fields, settings, or workflow by going into the form's Build tab and selecting Edit.
Some subscriptions also support form versioning, wherein a new version is created every time a published form is updated. Users can see past versions in the form's History tab, where you can view, restore, or copy them. You can also see any notes that are added when a form is published, allowing for greater form governance.
About the Form Builder and Field Options
The form builder shows your form layout and allows you to drag and drop your fields from the toolbox. The field toolbox is divided into three sections:
- Basic fields contain fields to collect different kind of information from respondents, such as text, dates, emails, and collection fields like checkboxes and radio button fields.
- Advanced fields let you collect more complex data. With these fields, respondents can upload files, draw signatures, and make payments. You can also collect location data, drop field sets, and create calculations.
- Layout fields allow you to organize your form into sections and groups, and add explanatory content to guide your respondents. This is also where you'll find office use only groups if your subscription includes workflows.
To add a field to your form, you must locate it in the toolbox and drag and drop it into position on your form. 
Once you have added the field, you can hover over it to see the following options (these can vary depending on the field):
|
|
Used for keyboard navigation to move the field up one place |
|
|
Used for keyboard navigation to move the field down one place |
|

|
Move the field up or down the form
|
|

|
Access settings for the field
|
|

|
Duplicate the field
|
|

|
Delete the field
|
Schedule Publish and Deactivation Dates
Form authors can schedule the publish and deactivation dates for their forms. To set a publish schedule:
- When your form is ready, select Publish > Schedule for later.
- Set the publication date, add any notes, and select Publish.
To set a deactivation date:
- After you Publish a form, or set a publication schedule, select Set deactivation date.
- Enter the date and select Set.
You can also set or edit the publication and deactivation dates by going to Settings > General settings and selecting Set date and time under the relevant option.
Any schedule set in the General settings will be overridden if an author selects Publish in the Build tab and then chooses to Publish now or set a new schedule. When a publication schedule is set the form's status will include an up arrow icon to indicate that someone has scheduled it; forms with a scheduled deactivation date will display a down arrow icon instead. When you hover over the arrow, a tooltip will appear displaying the scheduled date and time.
Please note that if your form is already live, you will need to Edit it to set a deactivation date in the Settings. To avoid creating unnecessary form versions, you should instead go to the form's History tab and select Edit deactivation schedule from the ... menu.
What Else?